How to Record Pickleball Games: Camera Setup, Angle and Tips
Recording a pickleball game is easy. Recording one that keeps the full court, both baselines, all four players, and enough ball flight in view to explain how a point developed takes a little more planning.
You are not filming a highlight reel. You are trying to preserve the decisions, movement, and spacing that created the final shot.
Quick answer
The best way to record pickleball games is to mount a phone or action camera in landscape mode behind one baseline, centered on the court and high enough to see over the closest players. Start around 7 to 10 feet high and 8 to 15 feet behind the baseline. Adjust until both baselines, both sidelines, both kitchen lines, the full net, and every player stay visible. For most phones, 1080p at 60 frames per second is the most practical place to begin.
A good match recording does not chase the ball. It preserves the whole point. If one player disappears, the nearest baseline is cropped, or the camera swings away from the off-ball action, part of the explanation disappears with it.
These recommendations are built for full-match tactical review, not broadcast production, close-up stroke analysis, or deciding a line call from video.
Get the position, framing, and settings right before the first serve. After that, the best thing the camera can do is stay still and keep recording. Once the match is saved, use the PickleTip pickleball video analysis guide and FILM method to turn what you see into a focused practice plan.
Best Camera Position for Recording a Pickleball Game
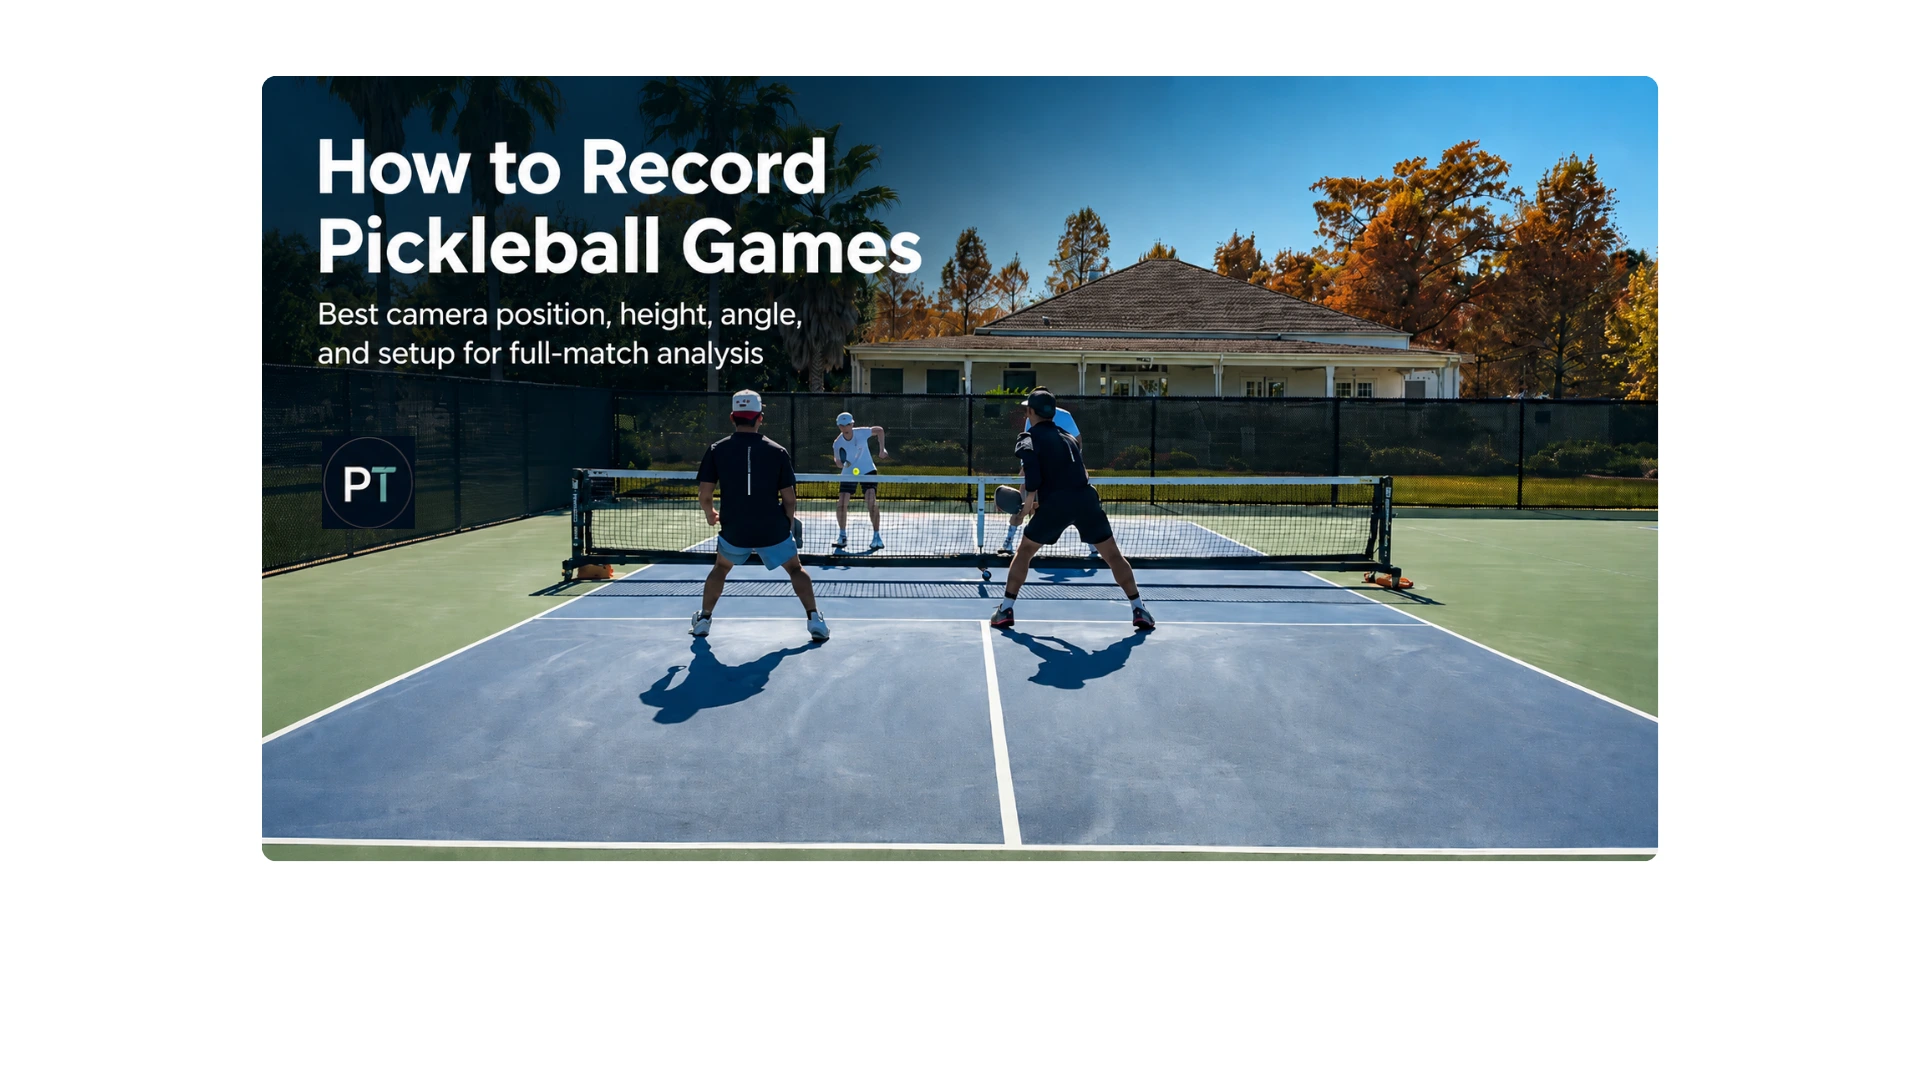
For a complete match, place the camera behind one baseline, as close to the centerline as the facility allows, and above head level. This angle shows the part most short clips miss: how the point developed before the winner or error.
From behind the baseline, you can see partner spacing, movement through the transition zone, who gave up the kitchen, whether the middle opened, and which shot changed the rally. That makes the angle useful for reviewing how a point developed, not just watching the ball go back and forth.

Recommended starting setup
- Position: Behind one baseline and as close to the centerline as the facility allows.
- Height: About 7 to 10 feet above the ground.
- Distance: About 8 to 15 feet behind the baseline with a typical wide phone camera.
- Orientation: Landscape, not portrait.
- Framing: Both baselines, both sidelines, both kitchen lines, the full net, and all players visible.
- Stability: Use a fence mount, tall tripod, or secure fixed support.
- Default setting: 1080p at 60 fps when the phone can sustain it for the full match.
Treat those numbers as a starting spot, not something every court has to obey. Lens width, fence location, court runoff, mount height, and the phone itself all change the final frame. Height, distance, and lens choice are connected decisions: change one and you usually need to adjust the other two.
The simplest setup rule
Raise the camera until the closest player stops becoming a wall. Move it closer only until the ball and paddle are easy enough to follow. The useful setup lives between those two problems.
Set the Camera High Enough to See Over Players
For most full-match recordings, 7 to 10 feet is the useful middle. I learned the low-camera problem the hard way after mounting mine at about 5 feet: the closest player blocked the ball and far court for most of the match. Much higher, and the players can become too small to read paddle contact and footwork clearly.
- Below 6 feet: Easy to mount, but the nearest players often cover the far kitchen, the ball, or part of their opponents.
- 7 to 10 feet: Usually high enough to see over bodies while keeping useful court depth.
- Above 10 feet: Can work when the camera sits close to the back fence, but check that the players and ball have not become tiny.
Simple height test
Stand at the nearest kitchen line while someone watches the preview. If your body covers a large part of the far court, raise the camera. If the players look like dots and the paddle is difficult to follow, lower it or move it closer.
Move Back Until the Entire Court Stays in Frame
With a normal wide phone lens, begin around 8 to 15 feet behind the baseline. The exact number matters less than what remains visible when players serve, move wide, back up for a lob, and crash the kitchen.
Move farther back when:
- the nearest baseline is cropped;
- a player disappears near either sideline;
- the camera cannot be mounted high enough;
- the lens cannot hold the full court without tilting sharply downward.
Move closer when:
- the players look too small;
- the ball is difficult to follow;
- there is excessive empty space behind the far court;
- an ultra-wide lens makes the match feel distant and flat.
When space is limited, switch to a wider lens before pointing the camera steeply at the ground. A dramatic downward angle may keep the painted lines in frame, but it makes depth, movement, and partner spacing harder to judge.
What Must Stay Inside the Frame
A good match video needs more than the painted court. Give players enough room to chase a lob, get pulled wide, and step behind the baseline without disappearing.
Full-court framing checklist
- The nearest baseline remains visible when the closest player serves.
- The far baseline is not hidden by the net or cropped from the frame.
- Both sidelines remain visible from baseline to baseline.
- There is a small amount of space outside each sideline for wide movement.
- The full net and both kitchen lines remain visible.
- No player disappears when moving wide or backing up for a lob.
- The mount, fence, post, or support does not cover a meaningful part of the court.
- The frame does not include so much empty space that the ball becomes difficult to follow.
Ask one player to walk the edges of normal play while someone watches the preview. Have that player stand at the nearest baseline, both sidelines, the kitchen line, and several feet behind the court. That 30-second walk catches more framing problems than staring at an empty court.
Which Camera Angle Shows the Whole Match?
| Camera angle | Best use | Main limitation |
|---|---|---|
| Centered behind the baseline | Full matches, partner spacing, transition movement, court position, and shot patterns. | The closest player may briefly block the ball if the camera is too low. |
| Behind the baseline from one corner | Useful when a gate, fence post, walkway, or facility rule blocks the center. | One sideline becomes compressed and the opposite side appears farther away. |
| Diagonal high-corner view | Works around court restrictions and can still show court geometry. | Middle coverage and distances look less symmetrical. |
| Side view | A specific stroke, swing path, contact point, footwork pattern, or drill. | Poor for full doubles analysis because players overlap and court depth is hard to read. |
What a full-court angle will not show well
A wide baseline view is strongest for spacing, movement, and shot patterns. It is less reliable for tiny paddle-face changes, subtle spin, and close line calls. Use a closer side angle when the goal is to study one stroke rather than the whole match.
When AJ and I film students, we usually try to capture two different angles. One view rarely shows enough to evaluate both full-court decisions and the smaller details of a stroke or movement.
Convenient Camera Setups That Usually Fail
| Setup | Why players choose it | What usually goes wrong |
|---|---|---|
| Phone near ground level behind the baseline | No tall mount is needed. | The nearest players block the far court, ball flight, and opponents. |
| Camera on the side fence | The mounting point is convenient. | Players overlap and the recording loses court depth. |
| 0.5x lens from very close range | The entire court fits immediately. | The ball and players become smaller and wide-angle distortion increases. |
| Auto-tracking mount | It feels more advanced and follows the action. | It may crop the off-ball partner, lose the ball, or hide the positioning that created the point. |
| 4K at 60 fps for every match | It is the highest available setting. | Heat, storage, and battery demands may stop the recording early. |
The fanciest camera on the wrong fence is still the wrong setup. For a complete game, protect the full court first. Use a side or diagonal angle when you are studying one specific stroke or movement, not the whole match.
Use 1x Until the Court Forces You Wider
Use the narrowest lens that still keeps the full court visible. On many phones, the standard 1x lens gives you a clearer image with less distortion. The 0.5x or ultra-wide lens is helpful when a fence, wall, or walkway forces the camera close to the baseline, but the players and ball will usually look smaller.
- Use 1x when you can move far enough behind the baseline to fit the court.
- Use 0.5x or ultra-wide when the available setback is too short for 1x.
- Avoid digital zoom because it throws away image detail without improving the camera position.
- Recheck the frame after changing lenses. Switching from 1x to 0.5x may tempt you to leave too much empty space around the court.
Phone lenses are not identical. A 1x lens on one device may frame the court differently from a 1x lens on another. Test the actual phone you plan to use rather than treating the label as a universal field of view.
Start With 1080p at 60 fps
For most matches, begin with 1080p at 60 frames per second. It is usually smooth enough to study paddle contact, footwork, and ball direction without making the phone work as hard as it may in 4K.
| Setting | When to use it | Tradeoff |
|---|---|---|
| 1080p at 60 fps | Full matches and most phones. | Good motion clarity without the largest files. |
| 4K at 30 fps | When you need more detail or expect to crop the footage. | Sharper image, but motion is not as smooth as 60 fps. |
| 4K at 60 fps | When the device can sustain it and extra detail truly matters. | Highest heat, battery, storage, and processing demand. |
| 1080p at 30 fps | When battery, storage, or indoor light is limiting the recording. | Smaller demand, but fast contact is less clear. |
Finish the match first
A complete 1080p recording beats half a match in 4K. Choose the highest setting your phone can sustain without overheating, filling its storage, or draining the battery before the game ends.
How much storage will a match use?
There is no single storage number that works for every phone. Different devices compress video differently, even when the resolution and frame rate look the same. Record a one-minute test clip on the exact device and setting you plan to use, check its file size, and multiply that by the expected match length. Leave extra room for a long game, warm-up, and a recording you forget to stop immediately.
Phone, Action Camera or Dedicated System?
| Camera type | Advantages | Watch for |
|---|---|---|
| Smartphone | Easy setup, strong video quality, simple sharing, and no separate camera to buy. | Battery drain, heat, storage, calls, notifications, and outdoor screen visibility. |
| Action camera | Compact body, wide field of view, durable mounts, and good motion capture. | Small preview screen, wide-angle distortion, battery limits, and extra transfer steps. |
| Fixed court system | Consistent angle and little setup when the facility already provides it. | Availability, account access, subscription cost, and limited control over framing. |
You do not need a dedicated camera to begin. A phone, secure mount, and correct placement can produce a more readable match than an expensive camera pointed from the wrong angle.
Tripod or Fence Mount?
Choose the mount by what the court gives you. A fence mount is usually cleaner, but not when every ball hitting the fence makes the video jump.
- Tripod: Flexible when no fence is available. Use a wide base, keep it outside the playing area, and add weight when wind or passing players could knock it over.
- Fence mount: Often the easiest way to reach a centered, elevated position. Mount to the most rigid section available and make sure the fence, post, or clamp does not cover the lens.
- Clamp or pole mount: Useful on a rigid post, railing, or fixed support when facility rules allow it.
- Tracking mount: Better for a single-player drill or social clip than a full doubles match. A moving camera can crop the off-ball partner and hide the spacing you need to evaluate.
Secure any overhead or elevated mount with a backup strap. Never place a tripod where a player could run into it while chasing a ball. The two linked products above are examples of the mount types; verify the fit, height, stability, and court rules for your own setup.
Lock the Camera Before the First Serve
Phones like to make decisions for you. During a match, those decisions can mean pulsing brightness, wandering focus, a rotated frame, or a recording interrupted by a call.
- Lock orientation. Stop the phone from rotating after it is mounted.
- Lock focus and exposure when possible. Set them near the center of the court, not on the closest player.
- Enable Do Not Disturb or airplane mode. Prevent calls and notifications from interrupting the file.
- Dim the screen after framing. Full brightness adds heat and battery drain while the phone is aimed away from you.
- Use external power carefully. Secure the battery and cable so neither can fall into the court or pull on the mount.
Keep the Sun and Heat From Ruining the Recording
Do not point the lens directly into the sun when another position is available. Strong backlighting can turn the nearest players into silhouettes and make the ball disappear against a bright sky.
- Keep direct sunlight off the lens with shade that does not enter the frame.
- Check where the sun will be later, not only where it is during setup.
- Avoid pressing a phone against a hot metal fence in direct sun.
- Remove a thick case if the phone commonly overheats, but only when the device remains secure.
- Lower the recording setting before sacrificing the full match to heat, battery, or storage.
- Do not cover the phone so tightly that the shade traps heat around it.
Indoor courts can fool the camera
An indoor court may look bright to your eyes while the recording still turns noisy or smears the ball. Keep the camera stable, test both 30 and 60 fps when needed, and use the setting the device can sustain cleanly in that light. Choose the setting that keeps player movement and the ball easiest to read, even if the preview does not look as bright or polished.
Audio, Permission and Court Courtesy
Tell the other players before you record. Facility rules vary, and a player who is comfortable being recorded may not be comfortable having the footage posted publicly.
- Ask all players before recording.
- Confirm whether the facility allows tripods, fence mounts, or filming.
- Keep equipment outside the playing area and common walkways.
- Do not assume permission to record also means permission to publish.
- Expect the microphone to capture nearby conversations as well as game sounds.
- For tournaments, ask before mounting anything to a fence or leaving equipment behind the court.
That is the courtesy side of it. Recording and consent rules can also vary by facility and location, so check before assuming.
The 60-Second Pre-Match Recording Check
Before the first serve
- Clean the lens.
- Mount the camera securely and add a backup strap when needed.
- Switch to landscape orientation and lock it.
- Choose 1x unless the available space forces you wider.
- Check both baselines, both sidelines, both kitchen lines, and space beyond the court.
- Have players stand at the nearest baseline and kitchen line to test obstructions.
- Confirm resolution, frame rate, battery, storage, and heat risk.
- Enable Do Not Disturb or airplane mode.
- Record a 10-second clip and play it back.
- Start recording before warm-up so you do not forget at game time.
When the Recording Goes Wrong
Problem
The nearest player blocks the far court. I have made that mistake.
Fix
Raise the camera first. That is usually the real problem. If the court still does not fit, center it more accurately or move it slightly farther behind the baseline.
Problem
The ball is difficult to see.
Fix
Move the camera closer, return to the 1x lens when framing allows, use 60 fps when the light supports it, and avoid shooting into the sun.
Problem
The footage shakes whenever a ball hits the fence.
Fix
Move the mount to a rigid post, use a tripod, tighten every connection, or isolate the camera from flexible fence fabric.
Problem
The court fits, but the players look tiny.
Fix
Move closer, switch from 0.5x to 1x when possible, and remove unnecessary empty space beyond the court.
Make Sure the Match Actually Saved
Before removing the camera, stop the recording and confirm that the file exists and plays. Rename it with the date, players, event, or game number so you can find it later. Keep the original file until any edited or uploaded copy is complete.
Once the full match is saved, camera setup is finished. The next job is figuring out what the footage is telling you: where the rally first became unstable, which patterns repeat, and what deserves practice. Continue to How to Analyze Pickleball Match Video and Improve Faster.
Frequently Asked Questions About Recording Pickleball Games
Mount a phone or action camera in landscape mode behind one baseline, centered with the court and roughly 7 to 10 feet high. Move it far enough back to keep both baselines, both sidelines, both kitchen lines, the net, and every player visible for the entire rally.
Use landscape mode for full matches. A pickleball court is wider than it is tall, so landscape framing gives you a better chance of keeping both sidelines and all four players visible. Record a separate vertical clip only when the goal is social media rather than match analysis.
1080p at 60 fps is the most practical default for most matches because it provides smooth motion without the storage, heat, and battery demands of 4K. Use 4K when the device can record the entire match reliably and you truly need extra detail or cropping room.
File size varies by phone, codec, resolution, frame rate, and quality setting. Record a one-minute test clip with the exact setting you plan to use, check its size, and multiply it by the expected match length. Leave extra storage for warm-up and a longer-than-expected game.
A fence mount is usually easiest when a centered, rigid back fence is available. A tall tripod is better when there is no fence or when fence vibration affects the footage. Whichever you use, keep it stable, secured, and outside the playing area.
Keep the camera stable and test the available light before the match. If 60 fps looks dark or noisy, compare it with 30 fps and use the setting that keeps the ball and players clearest. Indoor lighting can look bright in person while still producing motion blur on video.
Record the Whole Court, Not Just the Ball
A good setup should become boring: mount it, check the frame, press record, and forget about it until the match ends. Keep the camera stable, centered, elevated, and wide enough to preserve the full point without turning the players into dots.
Do not frame the winner. Frame what created the winner.
The handoff
Good footage preserves the full sequence. Once you have it, stop thinking about the camera and start reading the rally. Continue with the PickleTip FILM method for analyzing pickleball match video. After the footage reveals a repeated breakdown, use the PickleTip GROW Plan to choose the right drill, practice format, or live-play test.