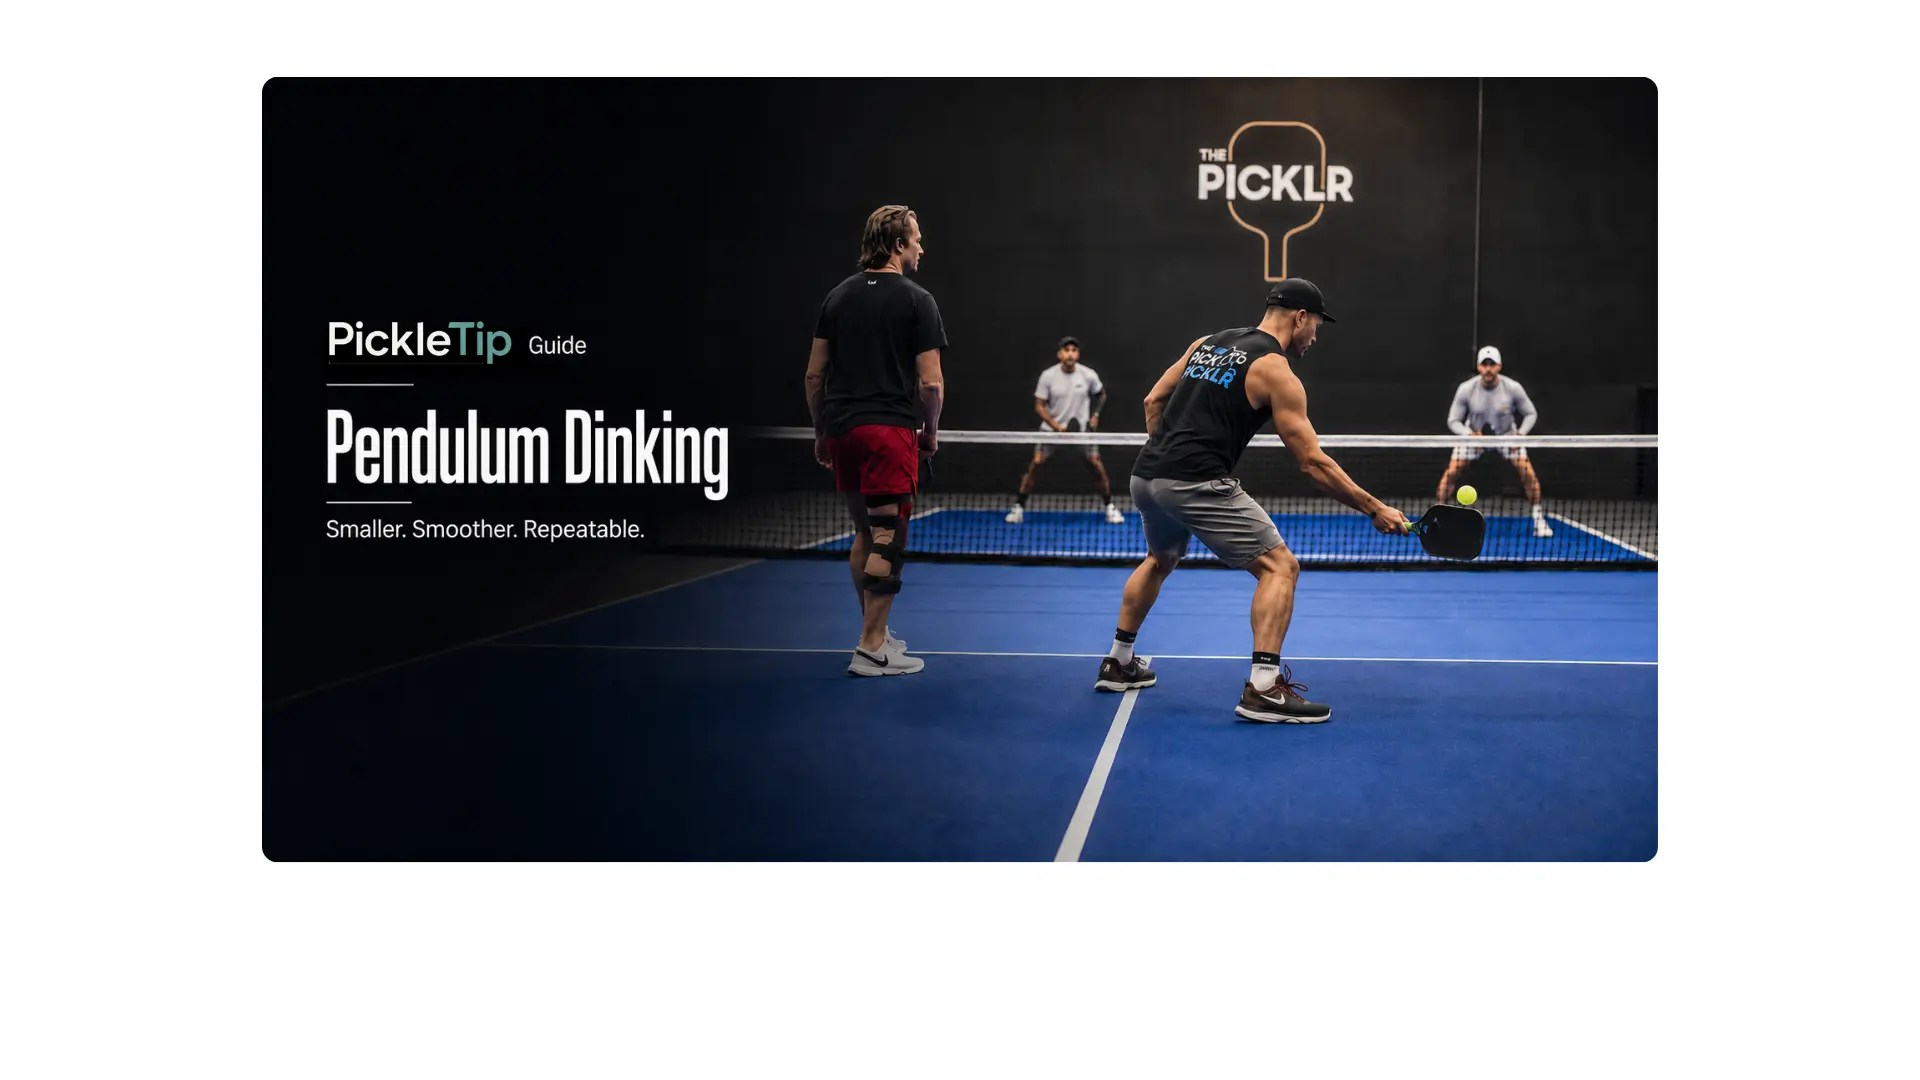
Pendulum Dinking: A Smaller, Smoother, More Repeatable Dink
Pendulum dinking is not a rule that turns your arm into a rigid clock. It is a simplifying cue for players whose dink breaks down because the wrist flicks, the elbow takes over, or the paddle changes direction too many times before contact.
The pendulum cue gives you one job: move the paddle through the ball on a small path you can repeat. For complete instruction on stance, grip pressure, contact, footwork, trajectory, and basic drills, start with How to Dink in Pickleball. For targets, patterns, pressure, and attack decisions, use Pickleball Dinking Strategy.
What It Is, and How to Know It Is Working
Pendulum dinking is a coaching cue for making the dink smaller, smoother, and easier to repeat. The shoulder carries most of the motion while the wrist stays stable and the elbow adjusts naturally for spacing. Contact the ball comfortably in front, guide the paddle forward with only the lift the ball needs, and finish small enough to recover immediately.
The cue is helping when it makes your motion smaller, smoother, less wristy near contact, and faster to recover. It is hurting when it makes you stiff, late, upright, unable to create space, or afraid to let the elbow adjust naturally.
Pendulum Dinking Guide
- What Is Pendulum Dinking?
- Why I Use This Cue
- Who the Cue Helps, and Who It Does Not
- What Pendulum Dinking Is, and Is Not
- Shoulder-Led Does Not Mean Locked
- Keep the Paddle Path Small
- Contact Point and Spacing
- Forehand Pendulum Dink
- Backhand Pendulum Dink
- When the Cue Starts Fighting the Ball
- Common Mistakes
- Progressive Pendulum Dink Drills
- Pendulum, Push, and Topspin Dinks
- FAQ
What Is Pendulum Dinking?
Pendulum dinking is a coaching term, not a separate shot named in the pickleball rulebook. It describes a compact, shoulder-led feel that helps simplify a basic dink and reduce unnecessary hand action.
The paddle starts close to the expected contact point, travels forward with a gentle upward blend, and finishes small. The wrist stays stable enough to organize the paddle face, while the elbow remains free to create room and match the incoming ball.
The name comes from the visual feel of a pendulum or gentle underhand toss. The comparison can help a player find rhythm and stop stabbing at the ball. It should not be taken literally. A player is not a grandfather clock, and the arm should not become mechanically frozen.
Pendulum dinking is best understood as a simplification cue, not a separate rulebook for every dink.
Why I Use This Cue
I usually bring up the pendulum when a player has turned one simple dink into four or five separate jobs. The wrist flicks, the elbow pokes, the paddle face opens, and then the hand tries to save everything at contact.
I am not trying to give that player a prettier swing. I am trying to give the paddle fewer chances to get lost.
I see this often with newer students. They think the hand failed, but the problem usually began before the paddle ever moved. The feet were late, the body was crowded, and the hand inherited a problem it could not cleanly solve.
During easy feeds, many of my students make the motion look clean. The real test comes when the ball moves a little wider, jams the hip, or arrives with more pace. That is when the feet stop helping and the hand starts improvising. The pendulum idea works only if the player can keep the motion simple without ignoring the ball in front of them.
The goal is not a prettier clock swing. The goal is fewer emergency corrections before contact.
Who the Pendulum Cue Helps, and Who It Does Not
| Player or Problem | How the Cue May Help | When Another Repair Comes First |
|---|---|---|
| Wrist flicks near contact | Takes the rescue job away from the wrist and gives the motion back to the shoulder. | If the ball is already crowded or behind the body, fix movement and spacing first. |
| Elbow pokes at the ball | Connects the hand to a smoother, more repeatable motion. | If the elbow is trapped against the torso, create room before changing the swing. |
| Beginner has too many instructions | Replaces a checklist for the wrist, elbow, shoulder, face, feet, and finish with one cleaner feel. | If the player does not understand basic trajectory or contact, teach that first. |
| Calm dinks keep popping up | Shortens the path and reduces late paddle-face changes. | If grip pressure is excessive or the face starts too open, repair that directly. |
| Long tennis-like backswing | Moves preparation closer to the ball and improves recovery. | If the player is late because of slow recognition or footwork, shortening the arm alone will not solve it. |
| Experienced player has accumulated too many moving parts | Can act as a temporary reset that restores rhythm and clean contact. | If the player needs more spin, reach, or defensive adaptation, do not force every ball into the same shape. |
Coach Sid’s diagnosis: If the paddle face changes three times before contact, simplify the swing. If the ball is jammed against your hip, move your feet. The pendulum can calm a busy hand, but it cannot create space you never made.
What Pendulum Dinking Is, and Is Not
| Pendulum Dinking Is | Pendulum Dinking Is Not |
|---|---|
| A compact shoulder-led motion | A locked-arm motion with every joint frozen |
| A stable paddle face matched to the ball | One fixed face angle for every contact |
| A controlled forward path with gentle lift | A scoop from directly underneath the ball |
| A simple base motion that can adjust to the ball | A universal motion for every ball or every soft shot |
Height, direction, pace, spin, distance from the body, and whether you take the ball after the bounce or out of the air all change the exact contact. The overall motion can stay quiet without forcing every dink to look identical.
Shoulder-Led Does Not Mean Locked
The shoulder leads because it can carry the paddle smoothly through the ball without asking the wrist or elbow to make a sudden correction at the last instant.
Keep the Wrist Stable, Not Stiff
A stable wrist keeps the paddle face from changing unpredictably through contact. It should travel with the arm rather than snapping independently. Do not squeeze the handle, lock the joint, or create tension all the way from the hand into the shoulder.
- The paddle face stays organized through the contact window.
- The hand remains relaxed enough to absorb pace and control touch.
- The wrist does not become the last-second steering wheel.
Let the Elbow Make Room
The elbow should not create a separate poke, chop, or scoop, but it still needs permission to adjust. A ball near the hip, outside the body, down by the shoelaces, or up near the waist will not give the arm the same amount of room.
Think quiet elbow, not fixed elbow. Shoulder-led does not mean locked. Let the elbow create room and let the wrist travel with the arm, just do not ask either one to rescue the paddle face at the last instant.
Useful feel: Let the shoulder carry the hand through contact while the elbow and wrist stay quiet enough to preserve the paddle face.
Keep the Paddle Path Small
Start the paddle close to where you expect to meet the ball. The farther it wanders behind you, the more work it has to do before contact.
- Prepare compactly: Keep the paddle in front and slightly below the expected contact.
- Lead with the shoulder: Move the hand smoothly toward the ball.
- Travel forward with gentle lift: Avoid lifting straight up.
- Contact in a comfortable window: Do not wait until the ball reaches the hip or falls behind the body.
- Finish small: Recover the paddle before the opponent contacts the next ball.
How Much Lift Does the Dink Need?
Enough to create usable net clearance and let the ball descend into the kitchen, without turning the dink into a vertical lift. The lower the contact gets, the more upward direction you may need. Catch the ball higher and comfortably in front, and more of the swing can travel forward.
The ball chooses the blend. Do not decide it in advance.
Let the ball tell you how open the paddle face needs to be. A low ball and a comfortable waist-high ball should not look identical.
Contact Point and Spacing
The feet have to create enough room for the arm to make the swing.
| Contact Problem | What Happens | First Repair |
|---|---|---|
| Ball crowds the hip | The elbow pins, the paddle face changes, and the stroke becomes a jab. | Move the feet and create room before swinging. |
| Ball reaches behind the body | The shoulder-led path disappears and the hand must rescue the shot. | Read earlier or use a safer neutral return. |
| Ball is too far away | The arm reaches and loses leverage. | Move closer rather than extending the swing. |
| Contact is comfortably in front | The shoulder can guide the paddle smoothly through the ball. | Repeat this spacing before adding harder targets. |
“Out in front” is not one fixed number. It means far enough ahead to guide the paddle through the ball without reaching, crowding, or contacting beside the hip.
Grip and Stance: Keep the Foundation Simple
A Continental-style grip works well here because you can handle forehand and backhand contacts without rebuilding the paddle face between balls. Grip pressure should be light enough for touch but secure enough to keep the face organized. A starting point around 3 or 4 out of 10 may work, but it is not a universal law.
Use a balanced athletic stance with comfortable knee bend, weight distributed through the midfoot and forefoot, and heels light enough to move. Do not perch on the toes or lean forward so far that balance disappears.
For the full grip and stance breakdown, use How to Hold a Pickleball Paddle and How to Dink in Pickleball.
How to Hit a Forehand Pendulum Dink
- Read the bounce and create space beside the forehand hip.
- Keep the paddle in front with a compact preparation near the expected contact.
- Let the shoulder guide the hand forward and gently upward.
- Maintain a stable face matched to the ball height.
- Finish toward the target without wrapping across the body.
Do not use “scoop” as the main feel. Scooping often encourages the face to open and the paddle to travel mostly upward from underneath the ball.
Guide forward. Add only the gentle lift the contact needs.
The forehand gives the arm room to become too large. This is where a compact dink can quietly turn into a small groundstroke. Keep the preparation and finish shorter than your instinct wants them to be.
How to Hit a Backhand Pendulum Dink
The backhand version uses the same shoulder-led idea, but the paddle usually works more naturally in front of the torso. The main risk is becoming crowded and pinning the elbow against the body.
- Create space so the handle and elbow are not trapped.
- Keep the paddle in front with a compact preparation.
- Let the shoulder carry the hand forward through contact.
- Allow the elbow to adjust naturally without turning the motion into a poke.
- Recover the paddle in front after a small finish.
The forehand usually grows too large. The backhand usually gets too crowded. Those are different problems, even when the same pendulum cue helps both sides.
If the ordinary backhand dink remains inconsistent, repair that foundation before treating the pendulum as a cure-all. Use How to Hit a Backhand Dink for the complete backhand mechanics.
When the Cue Starts Fighting the Ball
Some players hear “pendulum” and become stiff before they ever hit the ball. If that happens, use a different feel. “Quiet hand,” “small toss,” or “guide forward” may create the same result without making the arm act like a clock.
The Cue Has Become Too Rigid When:
- Your touch gets worse because the hand and forearm are tense.
- You refuse to adjust the elbow or paddle face when the ball changes height or distance.
- You protect the shape of the swing even after the contact point has disappeared.
Make the motion fit the ball. Do not sacrifice spacing, balance, or paddle-face control just to make the stroke look more pendulum-like.
Common Pendulum Dinking Mistakes
| Mistake | What It Causes | Better Cue |
|---|---|---|
| Locking the wrist | Tension, poor touch, and a rigid paddle face | Stable, not frozen |
| Freezing the elbow | Poor spacing and late contact | Quiet, not fixed |
| Swinging only upward | Floaters and popups | Forward with gentle lift |
| Scooping beneath the ball | Open face and vulnerable trajectory | Guide through the back of the ball |
| Large backswing | Late contact and slow recovery | Prepare near the expected contact |
| Pointing the paddle at the target after every dink | Oversized or forced finish | Finish compactly in the intended direction |
| Holding the line at all costs | Crowded contact when movement is needed | Protect position, but create space when the ball requires it |
| Using the cue on every ball | Rigidity when a neutral block, volley, roll, or stretch response is better | Choose the motion that fits the contact |
A popup is not always proof that you need a quieter wrist. The ball may have crowded the hip, the paddle face may have started too open, or the swing may have traveled mostly upward. Fix spacing and face stability before adding more hand action.
If your main mistake is a wristy attempt to create topspin, compare this simpler motion with Topspin Dinks in Pickleball. The topspin variation uses more active forward-and-upward brushing, but it still depends on spacing and a stable face.
Progressive Pendulum Dink Drills
These are the progressions I use to separate a hand problem from a spacing problem before asking a player to use the cue in live play. Do not trust the motion just because it looks clean without pressure. Build it slowly, add movement, then see whether it survives a real rally.
Where to Start
- If the paddle face changes at contact: Start with the Drop-Feed Contact Drill or Quiet-Hand Drill.
- If spacing is the real problem: Start with Move, Set, Swing.
- If the motion looks clean but you force it onto bad balls: Use the Pendulum-or-Neutral Callout.
You do not need all eight drills in one session. Start with the first drill that exposes your mistake, then move forward only when the motion survives an actual ball.
1. Shadow Pendulum Reps
Without a ball, rehearse a compact forehand and backhand path. Let the shoulder lead while the elbow and wrist remain relaxed and quiet.
Goal: 20 smooth repetitions without a large backswing or wrapped finish.
2. Drop-Feed Contact Drill
Drop the ball slightly in front and guide it into the kitchen using the shoulder-led motion. Hold the finish for one beat.
Goal: identify whether the face stayed stable and the finish remained balanced.
3. Quiet-Hand Drill
Have a partner feed easy balls. Focus on keeping the hand from snapping or changing direction near contact.
Goal: complete 15 controlled dinks with the same contact rhythm.
4. Forehand-Backhand Alternation
Alternate one forehand and one backhand pendulum dink. Keep the target generous and compare how the elbow naturally adjusts on each side.
Goal: preserve the same shoulder-led principle without forcing both sides to look identical.
5. Move, Set, Swing
Your partner feeds one step to either side. Move first, establish spacing, then use the compact pendulum motion.
Goal: keep the swing simple after the feet create the correct contact window.
6. Pendulum-or-Neutral Callout
Call “pendulum” when the ball arrives in a comfortable contact window. Call “neutral” when you are stretched, crowded, late, or off balance.
Goal: train the decision, not just the stroke. A useful cue does not have to be forced onto every ball.
7. Wall Rhythm Drill
Mark a net-height reference on a wall and stand at a distance that allows a comfortable rebound. Use controlled forehand and backhand contacts while keeping the swing compact.
Do not assume that standing exactly seven feet from the wall perfectly recreates a kitchen rally. The rebound distance depends on wall speed, ball type, pace, and trajectory. Adjust until the drill produces a manageable rhythm.
Goal: 25 contacts without the backswing growing or the wrist beginning to rescue the rebound.
8. Live Dink Transfer
Play cooperative dinks, then transition to a game to seven. Award yourself a technical win whenever the pendulum cue produces clean contact and quick recovery, even if the rally later ends for another reason.
Goal: transfer the simplified motion without becoming rigid under pressure.
Track These Outcomes
- Did the wrist stay stable without becoming tense?
- Did the elbow adjust naturally without creating a poke?
- Did the feet create space before the swing began?
- Did the finish remain compact?
- Did the cue improve control, or merely make the stroke look rigid?
Pendulum Dink vs. Push Dink vs. Topspin Dink
| Variation | Main Emphasis | Useful For | Main Risk |
|---|---|---|---|
| Pendulum dink | Simplified shoulder-led feel with quiet hand action | Calm rally balls, cleaner touch, and fewer last-second saves | Becoming too rigid or overly vertical |
| Push dink | Compact forward path with gentle lift | Neutralization, depth control, and dependable rally balls | Pushing too flat or using too much arm |
| Topspin dink | More active forward-and-upward brushing | Changing trajectory, bounce, depth, and pressure | Scooping, wristiness, or forcing spin from poor spacing |
These are not three sealed boxes. Real dinks exist on a spectrum. A push dink can feel pendulum-like. A shoulder-led dink can carry light topspin. The labels are useful only when they clarify what the player should change.
I use the pendulum less as a separate competitive shot and more as a way to organize the basic motion. A dependable push dink may already contain most of the same ingredients. The difference is emphasis: “pendulum” tells the player to calm the hand and repeat the path; “topspin” asks for more purposeful brushing and shape.
A similar shoulder-led feel may also help some third-shot drops, but a drop and a dink are not identical. Distance, swing size, contact, movement, and trajectory all change. Carry over the useful feel without pretending the two shots require the same motion.
What to Learn Next
| Your Question | Best Guide |
|---|---|
| What is dinking and why is it used? | Dinking in Pickleball |
| How do I build the complete basic dink? | How to Dink in Pickleball |
| Where should I aim and when should I apply pressure? | Pickleball Dinking Strategy |
| How do I add a controlled roll or topspin variation? | Topspin Dinks in Pickleball |
| How do I repair the basic backhand dink? | Backhand Dink |
| How should I hold the paddle? | How to Hold a Pickleball Paddle |
| How does the drop shot differ from the dink? | Pickleball Drop Shot |
Make the Dink Predictable
The pendulum cue works when it removes panic from the stroke. The shoulder carries the motion, the hand stops improvising, the paddle travels on a small repeatable path, and recovery becomes easier.
Keep the parts that improve contact. Discard the parts that create stiffness. The goal is not to make every dink look like a clock. The goal is to make the paddle arrive predictably enough that the ball stops surprising you.
Pendulum Dinking FAQ
No. Beginners may use the cue to reduce wrist flicks, elbow pokes, and oversized swings, but experienced players can also use it as a reset when a once-simple dink has accumulated too many moving parts.
A similar shoulder-led feel may help some soft drops, but a drop and a dink are not identical shots. Distance, swing size, contact, movement, and trajectory change. Carry over the useful feel without forcing the exact same motion.
Protect the kitchen line when you are balanced, but move when the ball requires space. Refusing to adjust can crowd the contact and force a wristy rescue. Recover toward an appropriate team position after the shot.
Choose the drill that matches the mistake. Use drop feeds or quiet-hand feeds when the paddle face changes at contact, Move, Set, Swing when spacing breaks down, and the Pendulum-or-Neutral Callout when you keep forcing the cue onto bad balls.
The wrist may not be the real problem. Check whether the ball crowded the hip, the paddle face started too open, the grip became tense, or the swing traveled mostly upward. Fix spacing and face stability before adding more hand action.