How to Hit a Pickleball Drive: Topspin, Power, and Control
If your pickleball drive feels powerful in warmups but disappears in matches, the problem usually is not strength. The swing gets late, your spacing shrinks, the paddle face changes, and the baseline starts looking like a magnet.
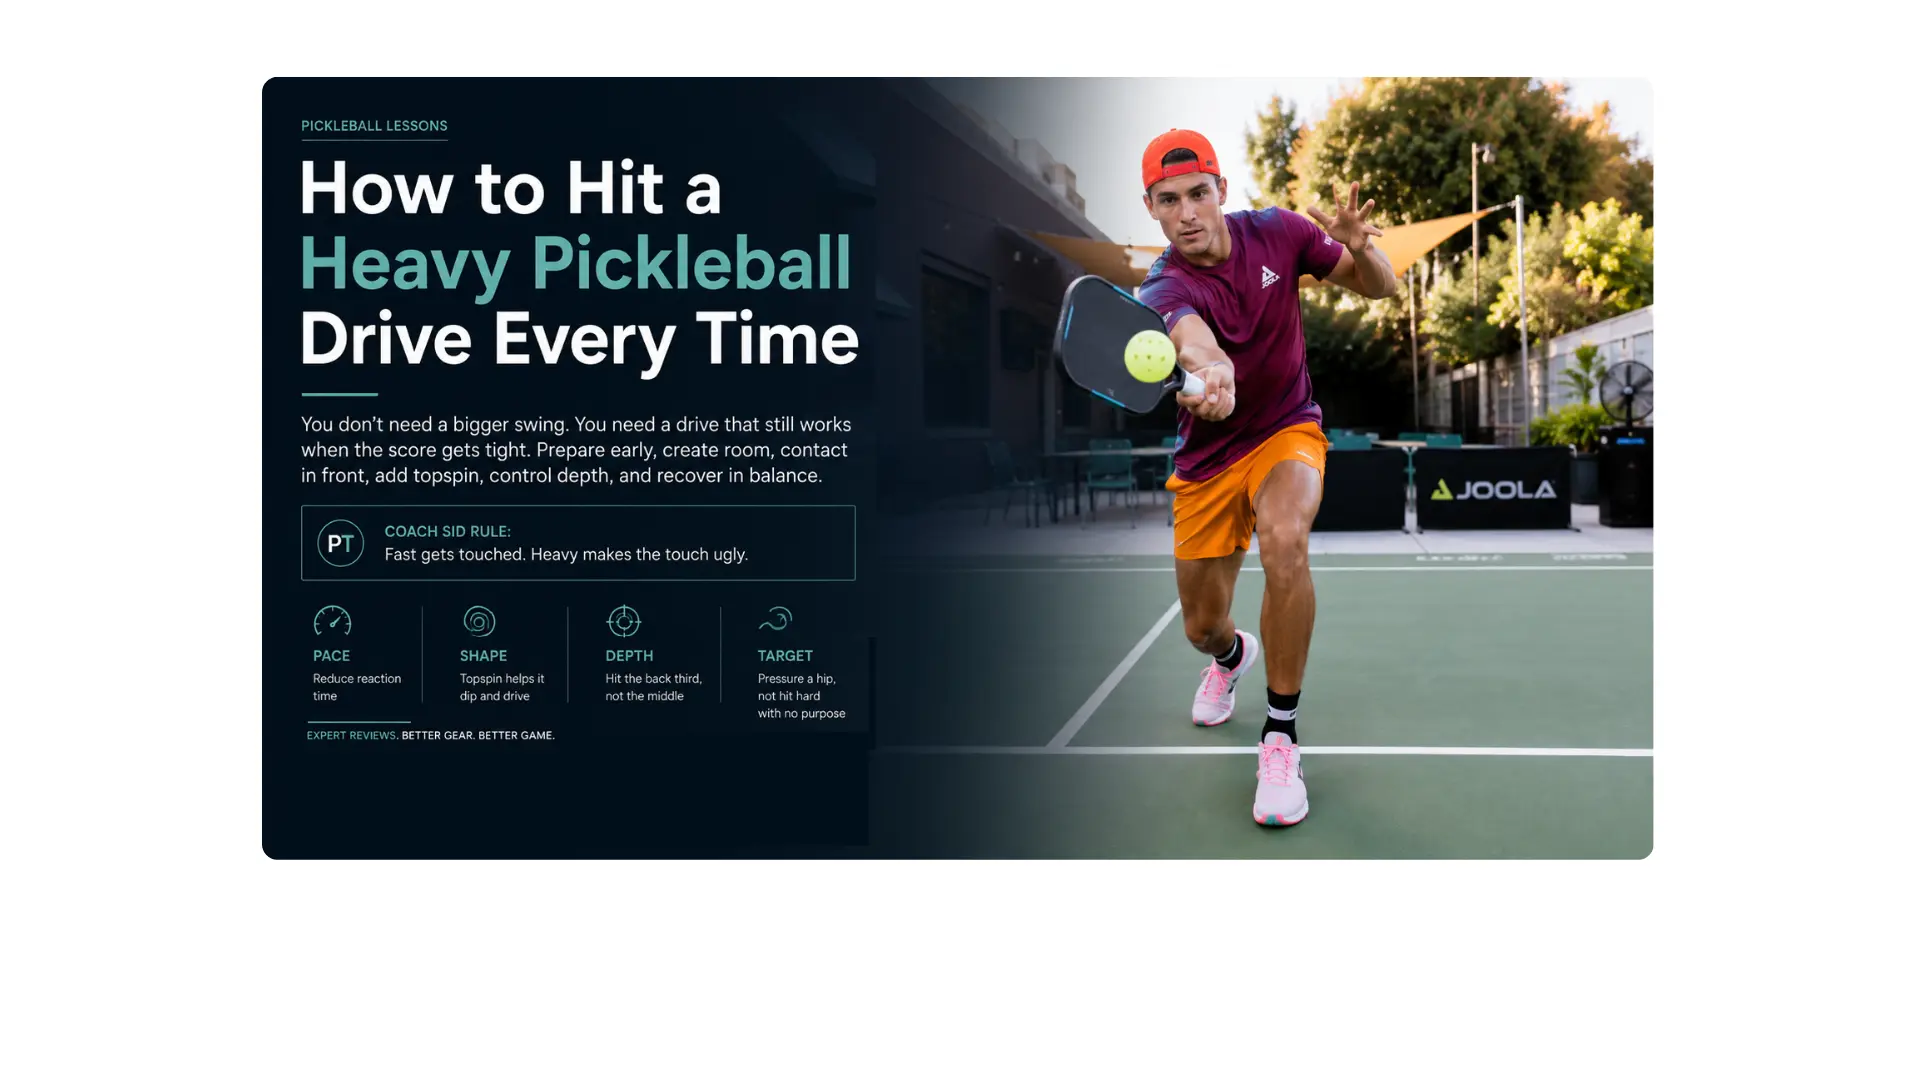
You do not need a bigger swing. You need a drive that still works when the score gets tight and the ball stops arriving exactly where you want it. That means preparing early, creating room, contacting in front, shaping the ball with topspin, controlling depth, and recovering in balance.
Pickleball drive definition: A pickleball drive is a firm groundstroke hit after the ball bounces. It usually travels with pace and topspin from the baseline or midcourt, with enough control to clear the net, dip into the court, and pressure the next contact.
This lesson is most useful for players who can already hit a drive but cannot always trust its shape, depth, or balance under pressure. It stays focused on building the stroke itself. Choosing between a drive, drop, reset, or hybrid is a separate decision, so I have linked those lessons where they become useful.
Coach Sid rule: Fast gets touched. Heavy makes the touch ugly.
What Makes a Pickleball Drive Heavy?
A loud drive is not automatically a heavy drive. A heavy ball combines enough pace to reduce reaction time with enough topspin, depth, and purpose to make the opponent contact late, low, jammed, reaching, or off-balance.
- Pace: the ball gets through the court quickly enough to reduce reaction time.
- Shape: topspin helps the ball clear the net, travel forward, and then dip.
- Depth: the ball lands far enough back that the kitchen-line player cannot handle it from a comfortable strike zone.
- Target: the ball pressures a hip, moving foot, seam, or open lane rather than traveling hard with no purpose.
A flat drive that lands short may feel fast but still arrive in the opponent’s favorite blocking zone. A deeper ball with useful dip can force a reaching block, an open paddle face, a late contact, or a weaker next shot.
Let the Block Tell You Whether the Drive Worked
Do not judge the drive only by the sound off your paddle. Watch what it does to the blocker.
| Opponent’s Contact | What It Usually Tells You |
|---|---|
| Planted, balanced, clean block | The drive may have been short, flat, or aimed into a comfortable paddle lane. |
| Late contact near the hip | The pace, depth, or target crowded the swing. |
| Open paddle face or floating ball | The ball dipped or arrived below the ideal blocking height. |
| Contact while retreating or reaching | The drive changed the opponent’s position and probably created a better next ball. |
Before you add speed: At roughly 70% effort, the ball should still clear safely, dip, reach the back third, and leave you balanced. If one of those disappears, more speed is not progress yet.
Drive, Volley, or Speed-Up: Know Which Ball You’re Hitting
| Shot | Basic Definition | Typical Court Context |
|---|---|---|
| Drive | A firm groundstroke hit after the bounce | Baseline or midcourt |
| Volley | A ball struck before it bounces | Usually near the kitchen or during transition |
| Speed-up | An attack that accelerates a slower kitchen or midcourt ball | Commonly from a dink or low-bounce exchange |
The swings can look similar, but the ball you are hitting (and the problem you are trying to solve) is different. This page teaches the drive after the bounce. For kitchen attacks, use Speed Ups in Pickleball. For fast volley exchanges, use Quick Hands in Pickleball.
Does This Work for Backhand Drives Too?
The same broad sequence applies on both sides: prepare early, create room, contact in front, shape the ball, and recover. This lesson demonstrates the forehand drive because that is the most common starting point. A one-handed or two-handed backhand uses different hand, shoulder, and spacing details and deserves its own breakdown rather than a few generic paragraphs here.
How to Hit a Pickleball Drive
Build the stroke in this order.
Learn how to hit a repeatable pickleball drive by preparing early, creating space, contacting in front, adding topspin, choosing a target, and recovering in balance.
- Read and Prepare
Split or settle as the opponent contacts the ball. Read the bounce early and begin the unit turn before the ball reaches your strike zone.
- Rotate and Create Space
Turn the hips and shoulders together, then use adjustment steps so the ball stays slightly in front instead of crowding your ribs.
- Meet the Ball in Front
Contact the ball in a comfortable strike window with enough room to swing forward. Keep the wrist quiet and the paddle face stable.
- Swing Forward and Up
Drive forward through the ball while brushing upward enough to create topspin. Avoid a weak straight-up loop or a downward chop.
- Pick a Net Window and Landing Box
Choose a safe net-clearance window and a deep landing area. Start with deep middle before shrinking the target toward hips, feet, or seams.
- Finish Balanced and Recover
Complete the swing without falling through the shot. Recover, read the opponent’s contact, and prepare for the next ball before advancing.
1. Read and Prepare
Most drives become late before the forward swing begins. The player watches the bounce, waits too long to turn, and then tries to create all the missing pace with the arm.
The late swing usually announces itself before the bounce. Begin the unit turn while the ball is still traveling. Let the shoulders and hips organize together and keep the paddle reasonably compact. A long looping backswing adds another moving part without guaranteeing a better ball.
Early-prep test: If the ball is already bouncing and your chest is still facing forward, you are probably late.
2. Rotate and Create Space
The arm should deliver the swing, not manufacture all of it. Let the feet create room, then let the legs and body turn carry the paddle through the ball.
Choose the stance that fits the time you have:
- More closed or neutral: useful when you have time to step, load, and rotate.
- Semi-open: useful when the ball arrives wider or recovery time is shorter.
- More square: sometimes necessary under pressure, provided you remain balanced and do not crowd the ball.
The stance is not the goal. The goal is space. If your elbow feels pinned and the paddle looks trapped beside your ribs, move your feet away from the ball before you make the swing larger. Many “swing problems” are really spacing problems wearing a fake mustache.
During lessons, I often feed the same ball again and ask the player to create a few more inches with the feet before changing anything in the swing. The stroke often cleans itself up once the paddle is no longer trapped beside the body.
3. Meet the Ball in Front
You do not need a laboratory-perfect contact point. You need enough room that the ball is not crowding your ribs and not dragging your arm toward the fence.
Contact may happen on the rise, near the top of the bounce, or slightly after it depending on incoming pace, contact height, and court position. The more useful question is:
Can I contact this ball in front while balanced, with enough space to swing forward?
If contact slides beside your ribs, you will often push, roll the wrist, or open the paddle face to rescue the ball. If it gets too far away, you reach and lose control of the path.
4. Swing Forward and Up for Topspin
I teach the topspin version first because it gives most recreational players more room over the net without giving away the baseline.
The paddle should travel forward through the ball with an upward component. A path that goes mostly upward produces a weak loop. A path that goes only forward creates a flatter ball with less room for error. Keep moving through the ball; a downward chop removes the clearance and shape you were trying to create.
Keep the wrist quiet through contact. The exact paddle-face angle depends on grip, contact height, swing path, and target. Do not treat “close the face” as the universal cure for every long ball.
- If the ball sails long: check for late contact, an opening face, too little spin, excess effort, or a target aimed directly at the baseline.
- If the ball goes into the net: check for body collapse, an overclosed face, a downward path, or contact that stayed too low and late.
Sound cue: A brushed “zip” often points to better shape than a flat “clap,” but the ball flight remains the real evidence.
5. Pick a Net Window and Landing Box
“Hit deep” is too vague. Give the ball two targets:
- Net window: the height and lane through which the ball should cross the net.
- Landing box: the area where the ball should bounce.
As a starting drill reference, imagine roughly one paddle-head of net clearance and mark a landing line about three feet inside the baseline. These are training references, not promises. Incoming pace, contact height, wind, ball condition, grip, and court position can all change the useful window.
| Target | Why It Works |
|---|---|
| Deep middle | Offers margin and can create indecision between opponents. |
| Hip lane | Jams the paddle and limits clean extension. |
| Moving feet | Disrupts balance and makes a clean block harder. |
| Seam | Forces communication and can create a late decision. |
Best default: Own deep middle and the back third before shrinking the lane toward hips, feet, and seams.
6. Finish Balanced and Recover
A good drive does not end at contact. Finish without letting your chest fall past your base or your feet run through the shot.
Then recover and read the opponent’s next contact. From deeper in the court, you may hold your position, take controlled ground, or prepare for another groundstroke. Do not automatically sprint forward because the drive felt good. The ball gets a vote.
For movement after a third-shot drive, use Third Shot Drive in Pickleball. For stopping, balancing, and moving through midcourt, use Pickleball Transition Zone.
The D.R.I.V.E. Checklist
When the score tightens, players often add motion instead of removing it. The backswing grows, the feet rush, and the target disappears. D.R.I.V.E. gives you five things to check before the swing turns into emergency improv.
| Letter | Cue | Job |
|---|---|---|
| D | Decide | Confirm that you have space, balance, and a realistic contact window. |
| R | Rotate | Turn early enough that the body can help instead of leaving the arm to rescue the swing. |
| I | Impact | Meet the ball in front with a stable face and a forward-upward path. |
| V | Visualize | Choose the net window and landing box before swinging. |
| E | Exit | Finish balanced, recover, and prepare for the next contact. |
D.R.I.V.E.: Decide. Rotate. Impact. Visualize. Exit.
I use D.R.I.V.E. when a player’s stroke starts growing under pressure. It tells you whether your body is in position to make the stroke. It does not tell you whether the shot is smart. For that decision, use Third Shot Strategy or Shot Selection in Pickleball.
Can You Drive a Ball Below Net Height?
Yes. A ball does not need to be above net height to be driven.
From the baseline or deeper midcourt, you may have enough court, space, balance, and upward swing path to lift a lower ball safely over the net with topspin.
Closer to the kitchen, the same low ball becomes much harder to attack because there is less court available for it to rise, clear the net, and dip. A roll, drop, reset, or neutral ball may be the better choice there.
Court-position rule: The closer you are to the net, the more ball height matters. The farther back you are, the more space, balance, and swing shape matter.
When Do You Have a Drive?
You probably have a drive when three things are present:
- Spacing: you can swing without being jammed or reaching.
- Balance: you can contact without falling forward, backward, or sideways.
- Contact window: you can meet the ball in front with enough room to swing forward and up.
That makes the stroke available. It does not automatically make it smart. Court position, opponent readiness, score, and the next ball you are trying to create still matter.
Mechanical availability is not strategic permission. Being able to drive the ball does not automatically mean the drive is the best choice.
Common Pickleball Drive Mistakes
Under pressure, the same misses tend to travel in packs. The preparation gets later, the backswing grows, the target disappears, and balance breaks before the player realizes anything changed.
| Result | Likely Cause | First Fix |
|---|---|---|
| Ball goes long | Late contact, opening face, flat path, excess effort, or target too close to the baseline | Meet earlier, reduce effort, add shape, and aim into the back third |
| Ball goes into the net | Body collapse, overclosed face, downward path, or contact too low and late | Stay stacked, swing forward and up, and recover the contact window |
| Drive is blocked clean | Ball lands short, travels flat, or enters a comfortable paddle lane | Add depth, usable topspin, or a more disruptive target |
| Drive feels slow | Late preparation, arm-only swing, poor spacing, or deceleration | Turn earlier, create room, and let the body carry the paddle through |
| Control disappears in matches | Backswing grows, grip tightens, target disappears, or balance breaks | Run D.R.I.V.E. and reduce effort until the shape returns |
Do not fix every long ball by closing the face more. Do not fix every net ball by opening it. Diagnose the timing, spacing, path, balance, and target first.
The Anchor Drill: Score the Drive That Matters
I have a friend with a tennis background who loves driving the ball directly at the player standing at the kitchen line. He has done it so consistently over the past three years that I now treat those shots as live blocking practice. The pace can look dangerous, but the pattern is expected, predictable, and much easier to handle than he thinks.
That predictable drive is the problem the Anchor Drill is built to expose. Players often reward the loudest ball even when the person at the kitchen line handles it comfortably. I use this drill because the blocker’s reaction reveals whether the drive actually created pressure. A useful drive should change the next contact.
Set a deep landing box and a visible net window. Hit 10 drives at roughly 70% effort while a partner blocks from the kitchen line.
- +2 points: clears the chosen window, dips into the back third, and forces a late, jammed, reaching, retreating, or elevated block.
- +1 point: clears the window and lands in the back third, but the blocker stays balanced and handles it cleanly.
- 0 points: lands in play but arrives short, flat, or in a comfortable paddle lane.
- −1 point: into the net.
- −1 point: out.
Working pass line: 12 points. Before adding speed, earn at least six +2 reps out of 10 and clear the pass line in two sessions. Twelve is a starting line, not holy scripture. Feed difficulty, wind, player level, and the blocker across from you can all change what a strong score looks like.
Once the score becomes repeatable, shrink the landing area or change the target lane before increasing effort.
Add speed only while the shape and depth remain intact.
Two-Session Pickleball Drive Plan
Session 1: Shape, Contact, and Depth
- 8 minutes: controlled drives at 60–70% effort through a broad net window.
- 8 minutes: spacing reps with wide, body, and middle feeds. Adjust before swinging.
- 10 minutes: two sets of the Anchor Drill.
- 4 minutes: work on the dominant miss only.
Session standard: A rep does not count when you fall through contact or lose the target.
Session 2: Movement, Targets, and Recovery
- 8 minutes: move, set, and drive from varied feeds.
- 8 minutes: deep-middle drives through the same window.
- 8 minutes: alternate hip, moving-feet, and seam targets without making the swing dramatically larger.
- 6 minutes: drive, recover, read the partner’s block, and play the next ball.
Keep the feeds varied enough that you must move and recover, but do not turn every rep into a full third-shot pattern yet. First make the drive repeatable.
Pickleball Drive FAQs
A pickleball drive is a firm groundstroke hit after the ball bounces. It usually uses pace and topspin from the baseline or midcourt to pressure the opponent while remaining controllable.
Check contact timing, paddle-face stability, swing path, effort, and target. Meet the ball in front, swing forward with an upward component, reduce excess effort, and aim into the back third instead of directly at the baseline.
No. A drive can be hit after many different bounces during a rally. A third-shot drive is the specific drive hit by the serving team after the return of serve, with additional strategic and movement consequences.
Where to Go After the Drive
- Third Shot Strategy — choose between a drop, drive, hybrid, or neutral ball after the return.
- Third Shot Drive in Pickleball — learn third-ball targets, expected blocks, fifth-shot preparation, and movement.
- Shot Selection in Pickleball — make better rally-wide decisions and manage risk.
- Resetting in Pickleball — neutralize pressure when the drive is no longer available.
- Pickleball Transition Zone — improve movement, stopping, and balance through midcourt.
- Watch the Ball in Pickleball — improve visual tracking and create calmer contact.
Final Coach Sid rule: Do not chase a harder drive. Build a ball that clears, dips, lands deep, and leaves you balanced enough to play the next one.