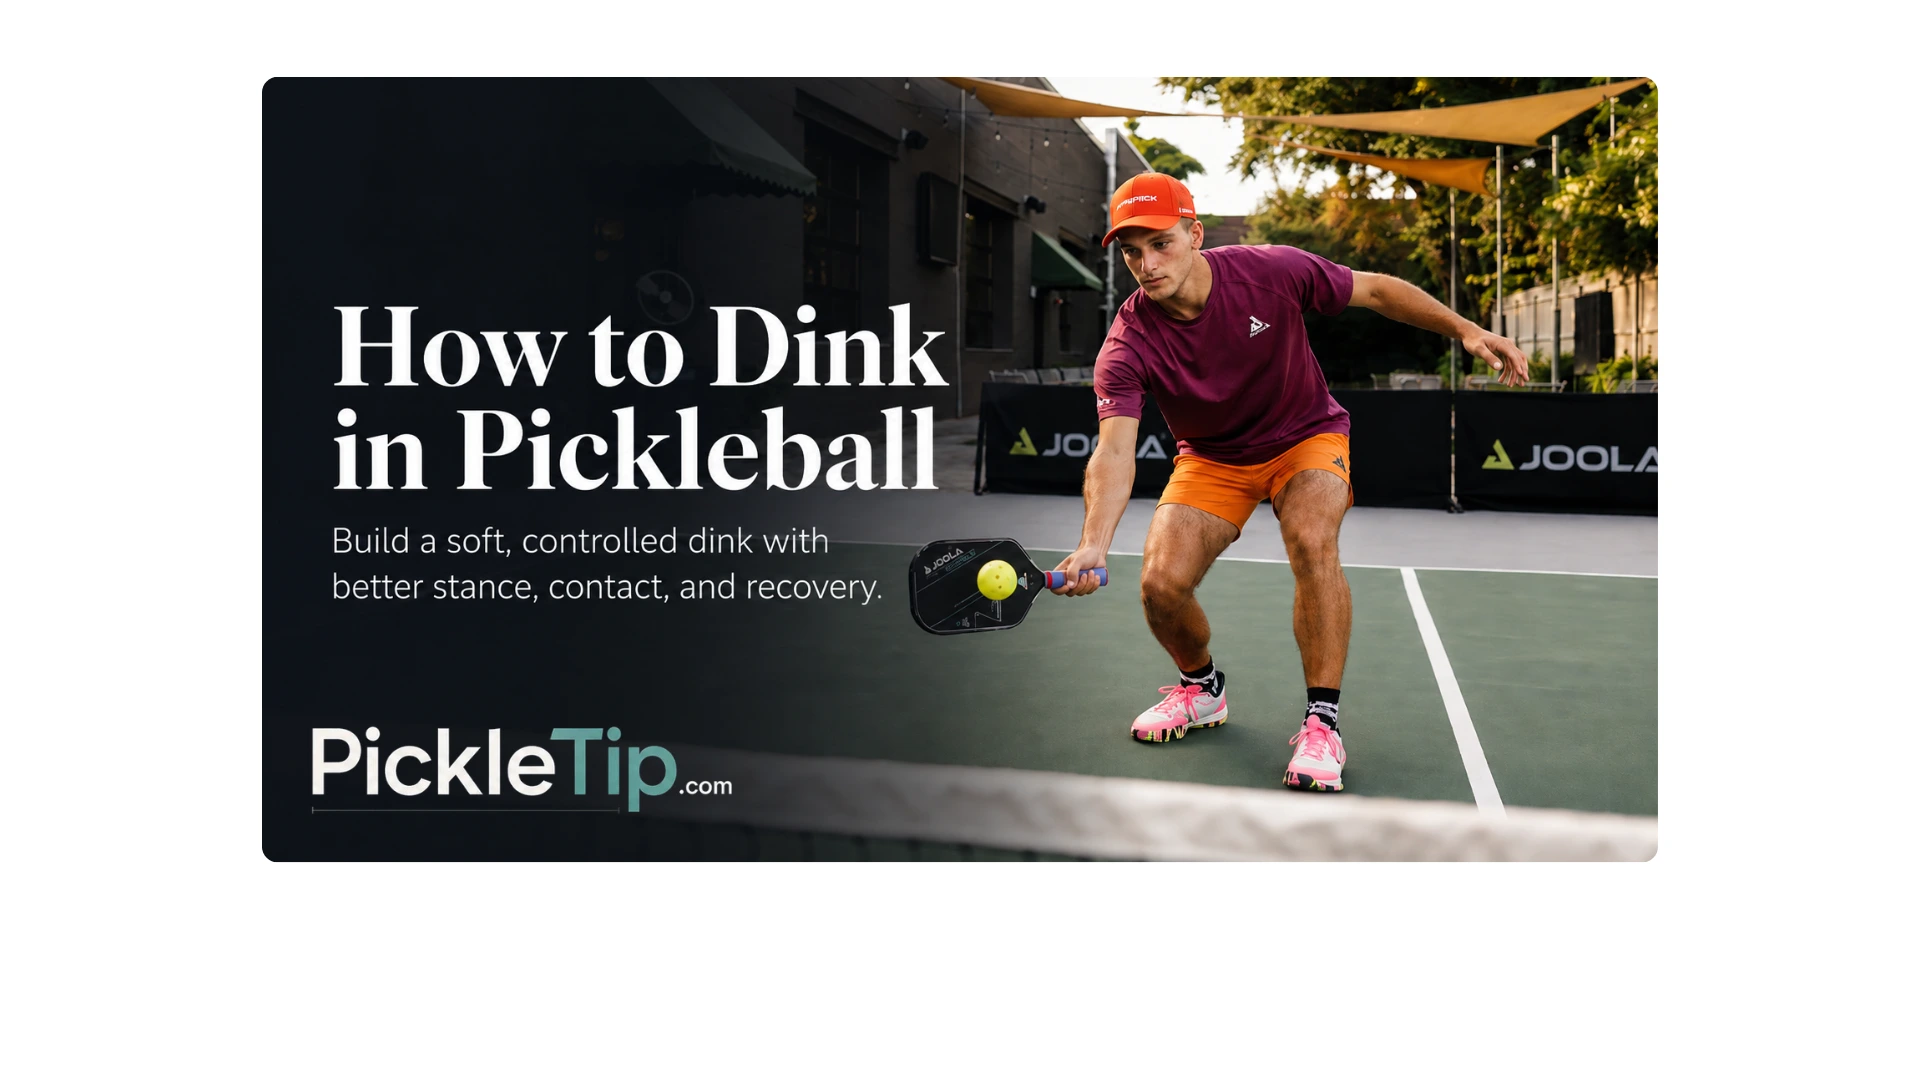
How to Dink in Pickleball: Mechanics, Footwork and Drills
Coach AJ Says
A good dink does not begin with a clever target. It begins with a paddle face that behaves, feet that solve the spacing, and contact that happens in front instead of beside your hip while your hand tries to improvise.
Now we can build the stroke itself, starting with the feet and paddle face, then adding contact, trajectory, recovery, and pressure. If you are still sorting out what a dink is supposed to accomplish, start with Dinking in Pickleball. This lesson begins where that one leaves off: making the ball behave often enough that strategy has something dependable to work with.
Quick Answer
To dink in pickleball, start balanced just behind the kitchen line, hold the paddle with light controlled pressure, prepare it in front with a short backswing, contact the ball slightly in front of your body, and lift through it with a stable paddle face. Finish compactly, recover your balance, and prepare for the next ball before admiring the one you just hit.
Build the Motion, Then Diagnose It
| Stage | Build | Check |
|---|---|---|
| Set | Balanced stance, soft knees, paddle in front. | Balanced and ready? |
| Prepare | Read the bounce and move before it crowds you. | Feet moved early? |
| Contact | Meet the ball in front with the face set. | Clean contact window? |
| Lift | Guide forward and up with a compact path. | Face and path stable? |
| Recover | Return the paddle and rebalance. | Recovered in time? |
Coach AJ’s Earliest-Breakdown Rule: the body part that makes the final mistake is not always where the mistake began. Check movement and spacing before changing the wrist or swing. Poor footwork crowds the ball, and crowded contact forces the elbow or wrist to rescue it.
This order is a starting point, not a claim that every miss begins with the feet. You can arrive perfectly and still squeeze, overaccelerate, or change the face. Start with the earliest broken link because a hand correction rarely holds when the spacing is already gone.
How This Dink Lesson Builds
Build the Stroke
- What a Repeatable Dink Motion Looks Like
- Ready Position and Stance
- Grip Pressure
- How to Keep the Paddle Face Stable
- Contact Point and Ball Spacing
Use It on Court
- The D.I.N.K. Check for Live Play
- How to Hit a Forehand Dink
- How to Hit a Backhand Dink
- Footwork and Recovery
- Net Clearance, Height, and Depth
- When to Take a Dink Out of the Air
Fix and Develop It
The Basic Dink Motion You Need First
A repeatable dink is a small whole-body movement, not a wrist trick. Your feet establish the spacing. Your legs and shoulder support the lift. Your hand keeps the paddle face stable. The stroke stays compact because the ball is already close to the net and does not need a full swing.
Start with the paddle in front. Give the ball only the backswing it requires, move forward and slightly upward through contact, and stop before the finish wraps across your body. A low ball may need more lift. A higher ball may need less. Either way, clear the net, make the ball descend, and avoid handing your opponent a comfortable downward swing.
Coach AJ court note: When a player tells me the dink “just disappeared,” I watch the feet before the paddle. The hand often looks guilty because it made the final mistake, but the crime started earlier when the player stopped moving and let the bounce crawl into the body.
I see this most often at Elmwood clinics when a player can dink cleanly from a stationary feed but starts popping the ball up as soon as the partner moves it half a step. The swing did not suddenly forget how to work. The spacing changed, the player reached, and the hand tried to repair the contact. Before adding another wrist cue, I move the ball more slowly and make the feet solve the bounce again.
Do not chase spin, disguise, or sharp placement yet. Build a ball you can repeat under ordinary pressure. Fancy mechanics built on unstable contact are just expensive decorations on a wobbly porch.
Ready Position and Stance at the Kitchen Line
Pretend the kitchen line is a magnet. Set your ready position close enough to protect the line, with both feet behind it and enough athletic space to move. You may step into or stand in the kitchen at any time. You simply cannot volley while touching the non-volley zone or its lines, and your momentum after a volley cannot carry you into it. For the complete rule and official source, use the Pickleball Kitchen Rules guide or the current USA Pickleball rulebook. Avoid planting your heels or standing so tall that every low bounce catches you unprepared.
- Feet: slightly wider than hip width, with pressure through the balls of the feet rather than the heels.
- Knees: comfortably bent, not forced into a deep squat.
- Chest: balanced over the base instead of leaning backward.
- Paddle: in front of the torso, ready to move to either side.
- Head: quiet enough to track the bounce and opponent contact.
The ready-position test: could you move one step left, one step right, or forward to volley without first standing up or untangling your feet? If not, your stance is posing instead of preparing.
The paddle should remain in front, but “in front” does not mean frozen directly under your chin. Let it sit in a neutral location where either hand path can begin without a large loop.
How Tight Should You Hold the Paddle When Dinking?
Start near 3 out of 10, then watch what happens before contact. The exact number matters less than whether your forearm tightens as the ball arrives. The paddle should feel secure without being squeezed.
That number is a teaching starting point, not a law carved into the kitchen line. The incoming ball, paddle weight, contact location, and your hand strength all change the exact feel. Paddle balance also changes the sensation. A head-heavy paddle may feel naturally settled to one player and harder to control to another, while a faster incoming ball may require a little more firmness. Watch for the real warning sign: a sudden squeeze at the bounce or just before contact.

What Light Grip Pressure Should Feel Like
- Your fingers control the handle without crushing it.
- Your forearm remains relaxed before the bounce.
- The paddle face does not wobble through contact.
- You can absorb a faster ball without stabbing at it.
- You can add a little firmness when needed without changing the entire swing.
“Let the ball hit the paddle” is a useful cue when players swing too hard, but it can create a different problem when they become completely passive. The paddle still needs a small intentional path through the ball. Soft hands do not mean dead hands. You are removing unnecessary tension and acceleration, not asking the ball to complete the stroke by itself.
Build the Dink Around a Stable Paddle Face
Set the Face Before the Ball Arrives
The paddle face should be open enough to create the lift that particular ball needs, but not so open that it launches upward. Prepare the angle early. A stable paddle face is not frozen; it simply avoids a sudden angle change immediately before or during contact. Those last-second changes are what make a dink float, dive, or wander sideways.
Do Not Take the Paddle Behind the Hip
Imagine a wall just behind you. The paddle can move back enough to match the incoming ball, but it should not disappear behind the hip or wind up like a groundstroke. A large takeback adds timing you do not need and speed you will later have to remove.
Move Forward and Up, Without Scooping
Move the paddle gently forward and slightly upward through the ball. Players get into trouble when the path circles before contact, scoops sharply underneath the ball, chops down to manufacture slice, or changes direction while the ball is on the face. Keep the path simple enough that it survives a long rally without extra thought.
About slice: backspin does not require a dramatic chop. A slightly open face and a natural forward path can create some underspin without the hand carving underneath the ball. When players try to manufacture slice with a sudden downward cut, the ball often floats because the paddle face opens while the path loses forward control.
If excessive wrist and elbow movement keep changing the face, pendulum dinking gives you a simpler shoulder-driven model to practice.
Where Should You Contact a Pickleball Dink?
Contact the dink slightly in front of your body and inside a comfortable reach. The exact distance changes with forehand, backhand, ball height, and your body proportions, but the ball should not be buried beside the hip or drifting behind you.
| Contact Location | What Usually Happens | Better Adjustment |
|---|---|---|
| Slightly in front | The paddle face stays visible and the path can continue toward the target. | Keep this window and recover after contact. |
| Beside the hip | The elbow and wrist begin rescuing the shot, often sending it high or sideways. | Move earlier and create space around the bounce. |
| Behind the body | The face opens late and control disappears. | Let the ball go only when necessary; otherwise adjust the feet sooner. |
| Too far away | The body leans, the paddle stretches, and recovery slows. | Use a controlled lateral step rather than reaching. |
| Too close | The handle jams into the body and the paddle face changes. | Create room with small adjustment steps before the bounce. |
The best contact point is not a fixed dot painted on the court. It is the location where you can keep the paddle face stable, move through the ball, and finish balanced.
The D.I.N.K. Check for Live Play
The motion builds the stroke. The diagnostic helps you find where it failed. The D.I.N.K. Check is the short decision sequence you can carry into a rally when there is no time to rebuild mechanics.
The D.I.N.K. Check
Do not attack a ball that has not earned it.
| Letter | Check | What It Means |
|---|---|---|
| D | Decide | Is this ball truly attackable, or does the rally still require patience and another dink? |
| I | In Front | Create enough space to contact the ball in front of your body instead of reaching beside or behind it. |
| N | Net Margin | Give the ball enough height to clear the net safely without floating into a comfortable attack. |
| K | Keep It Down | Make the ball descend and bounce low enough that your opponent has to dink again. |
Decide. In front. Net margin. Keep it down.
The goal of a dink is not simply to hit the ball softly. The goal is to give your opponent a ball they cannot comfortably attack. A soft ball that floats shoulder-high has not completed that job. A dink with safe clearance, controlled descent, and a low bounce has.
Coach AJ court note: Do not turn the acronym into four separate swing thoughts while the ball is arriving. Use it as a quick sequence: decide what the ball allows, create contact in front, give it usable net margin, then judge the shot by the contact your opponent receives. D.I.N.K. will not repair broken mechanics during a rally. It helps you make a better decision with the stroke you currently own.
Ready position and footwork create In Front. Paddle-face control and swing path create Net Margin. Trajectory and depth help you Keep It Down. The Decide layer becomes more useful after those mechanics stop demanding all of your attention. Once the stroke is dependable, the Pickleball Dinking Game teaches the full decision layer: targets, pressure, patterns, and attack timing.
Forehand Dink vs. Backhand Dink
The forehand and backhand are not two different strokes. The foundation stays the same; the spacing problem changes. The forehand usually needs room beside the paddle-side hip. The backhand more often needs elbow room in front of the torso and through the middle.
| Contact | Usually Handles | Main Spacing Problem | Useful Cue |
|---|---|---|---|
| Forehand dink | Balls beside the paddle-side hip and farther outside the body. | Waiting beside the bounce and reaching late. | Move around the bounce and send the hand through the target. |
| Backhand dink | Middle balls and balls that enter closer to the torso. | Letting the front hip or body crowd the handle. | Create elbow room and meet the ball before it reaches the body. |
How to Hit a Forehand Dink
- Move around the bounce. Create enough room that the ball arrives beside and slightly in front of your paddle-side leg.
- Set the face early. Prepare the angle before the ball enters your contact window instead of changing it while the ball is arriving.
- Send the hand through the target. Use a compact forward-and-upward lift, then stop before the finish becomes a drive.
- Return to neutral. Rebalance and bring the paddle back in front before the opponent contacts the next ball.

When the forehand begins looking like a tiny drive, the backswing usually grows and the ball starts arriving faster than the player can control. Build the basic push dink with a stable face and controlled forward lift first. Add the faster brushing path of a topspin dink only after you can repeat the push dink while moving; the dedicated topspin dink guide shows how to add that brush without losing the foundation.
Forehand warning: if the ball reaches your hip before the paddle starts forward, the problem is probably spacing, not a missing wrist adjustment.
How to Hit a Backhand Dink
The backhand dink often covers the middle and handles balls that arrive closer to the body. It needs structure, but structure is not the same as tension. Set the wrist in a stable, comfortable position before contact rather than locking it into an exaggerated cocked angle.
- Create room in front of the hip. Slide, turn, or drop a foot before the handle becomes trapped against the body.
- Set the elbow comfortably away from the torso. Give the paddle room to travel without lifting the elbow into a chop.
- Let the tip position fit the ball. A middle ball may produce a more tip-down paddle; a wider ball may allow a more open orientation.
- Meet the ball before it reaches you. Use a compact forward-and-upward path, then recover the paddle to the middle.
Let the paddle angle fit the ball without letting it change during contact.
Coach AJ court note: On a crowded backhand, the elbow often chops because the handle has run out of room. Before changing the wrist, check the spacing: create room in front of the hip, then see whether the same stroke settles down.
For a deeper breakdown of routine backhand mechanics, use the Backhand Dink guide. When the ball pulls you outside your normal contact window, move to Backhand Dinks on the Stretch.
Dinking Footwork: Move Around the Bounce
There is no single universal “anchor foot” rule for every dink. The movement depends on the ball. You may shuffle for a small spacing change, step laterally for a wider bounce, pivot when the ball enters the body, drop a foot to create room, or use a controlled lunge when the ball pulls you outside your base. Do not marry one footwork pattern. Use whichever movement gets you balanced with room for clean contact.
Move around the bounce means using your feet to place the ball inside a comfortable contact window instead of waiting in one spot and reaching after it.

Use Small Steps Before a Large Reach
Small adjustment steps help you read the bounce and refine spacing. One controlled larger step may be needed for a wide ball, but repeated lunging should not be the default. Large reaches lower consistency, pull the head outside the base, and make recovery slower.
Keep the Upper Body Quiet While the Feet Move
Move the feet without bouncing the upper body unnecessarily. When the head rises and falls during contact, the paddle face and contact height often change with it.
Recover According to the Ball You Hit
Do not automatically sprint to a generic “middle” after every dink. Recover enough to protect the likely next shot, support your partner, and avoid leaving a large gap. In a straight-ahead exchange, that may mean returning toward your normal lane. A wide cross-court exchange creates a different recovery problem because the angle you opened still needs protection. Cross-Court Dink Defense breaks down that positioning in more detail.
Footwork cue: move early enough that the paddle does not need an emergency route to the ball.
How High Should a Dink Travel?
There is no perfect number of inches above the net for every dink. Ball speed, spin, contact height, target depth, wind, and your court position all change the required arc. Give the ball enough margin to cross safely, then shape it so it descends before the opponent can make comfortable downward contact. A tape skimmer is not automatically a better dink.
| Ball Result | Likely Trajectory Problem | Mechanical Adjustment |
|---|---|---|
| Hits the net | Too little lift, too little margin, closed face, or late contact. | Contact in front, open the face slightly, and lift through a safer window. |
| Floats shoulder-high | Face opened late, grip tightened, or path scooped upward. | Set the face earlier and move forward through the ball instead of underneath it. |
| Lands too short | Not enough forward energy or contact too passive. | Lengthen the forward portion of the path without adding a large backswing. |
| Travels too deep | Too much speed, firm grip, or insufficient descent. | Reduce acceleration, soften the hand, and create more controlled shape. |
| Drifts sideways | Face changed near contact or body spacing forced a rescue motion. | Move around the bounce and stabilize the face before contact. |
How to Control Dink Depth
Depth comes from forward path, paddle-face angle, contact quality, and grip pressure, not speed alone. A ball that needs more depth may need a slightly longer forward path. A shorter ball usually needs less forward energy and a more controlled arc, not a completely different swing.
Prove that you can send the same basic motion to different depths without turning it into three unrelated swings. Once that feels dependable, you can begin changing targets without rebuilding the stroke each time.
Should You Take a Dink Out of the Air?
Take the ball out of the air when you can contact it comfortably in front without losing balance or changing the paddle face at the last second. Let it bounce when the volley would jam your body, force an awkward reach, or pull your weight into the kitchen.
| Volley the Dink When… | Let It Bounce When… |
|---|---|
| The paddle can meet the ball comfortably in front. | The ball is dropping at your feet or into your body. |
| You can stay balanced behind the kitchen line. | Reaching would pull you across the line or outside your base. |
| The face is prepared early. | You would need a sudden wrist or elbow adjustment. |
| The contact helps you protect your position. | The bounce will create a cleaner, calmer contact. |
Taking the ball early can remove time and help you hold the line, but “take as many as possible” is not a complete rule. A controlled bounce contact is better than a forced volley that pops up. Remember that your momentum cannot carry you into the non-volley zone after a volley; the Pickleball Kitchen Rules guide explains the full fault and links to the current official rulebook.
Why Do Your Dinks Pop Up, Hit the Net, or Drift Wide?
| Miss | Most Common Causes | First Fix to Test |
|---|---|---|
| Pop-up | Tight grip, open face, scoop, contact behind the body, or reaching from poor balance. | Move earlier, contact in front, and keep the face stable. |
| Net ball | Poking forward, closed face, late contact, or aiming too low. | Add safe net margin and a controlled low-to-high path. |
| Ball goes long | Too much forward speed, firm hand, or large backswing. | Shorten the swing and reduce acceleration. |
| Ball pulls wide | Contact too far beside the body or face rotating near contact. | Create better spacing and finish through the intended line. |
| Inconsistent direction | Busy wrist, changing grip pressure, or unstable feet. | Simplify the motion and practice one target cooperatively. |
| Backhand floats | Elbow chop, crowded contact, exaggerated open face, or late feet. | Move closer to the bounce and contact slightly in front. |
| Wide ball causes a fall | Reaching before moving or lunging without recovery control. | Use adjustment steps and a controlled lateral move. |
The miss may look identical across skill levels, but the first correction should match the earliest breakdown.
| Player Stage | What I See Most Often | First Place to Look |
|---|---|---|
| Beginner | An oversized swing, a face that changes late, or contact after the ball reaches the body. | Simplify the path and rebuild a clean contact window. |
| Improving player | A decent basic stroke that disappears when the ball moves them, the rally speeds up, or they add spin from poor balance. | Check movement, spacing, and whether the original stroke survived the pressure. |
Do not fix seven things at once. Watch the result, find the first broken link, and test one correction. A second cue added before the first one has been tested only gives the confusion another roommate.
Match the Miss to the Right Drill
| Earliest Breakdown | Best Drill to Test | What to Watch |
|---|---|---|
| Uncertain contact or changing face | Self-Feed Contact Drill | Contact in front with the same face angle before and through the ball. |
| One good dink but poor repetition | Cooperative Straight-Ahead Dinks | Repeatable height, pace, and compact finish. |
| Stroke fails when the ball moves | Move-Around-the-Bounce Drill | Feet solve the bounce before the hand starts rescuing it. |
| Net balls or shoulder-high floaters | Height-Window Drill | Safe clearance followed by descent into the kitchen. |
| Mechanics tighten under consequences | Pressure Five | Grip pressure and swing size stay calm after the count matters. |

Once your basic mechanics are dependable, stop adding swing thoughts to solve strategic problems. If the stroke works but the rally still goes nowhere, the next questions are placement, rhythm, pressure, opponent weaknesses, and attack timing. The Dinking Game guide shows you how to turn the dependable stroke into pressure.
Dinking Drills That Build in the Right Order
Do the drills in order. Pressure scoring does not repair contact you cannot yet repeat cooperatively.
1. Self-Feed Contact Drill
Stand near the kitchen line, gently drop the ball in front of your forehand, and dink it over the net. Repeat on the backhand. Focus on contact slightly in front, a stable face, and a compact finish.
Solves: uncertain contact point, oversized swing, and a paddle face that changes near the ball.
Goal: 20 controlled contacts on each side without chasing placement.
2. Cooperative Straight-Ahead Dinks
Dink directly across from a partner. Keep the target generous and count consecutive balls. Restart only when the ball goes into the net, lands out, or rises into an obvious attack.
Solves: players who can produce one decent dink but cannot repeat the same height and pace.
Goal: three rounds of 20 controlled dinks.
3. Forehand-Only and Backhand-Only Rounds
Use footwork to create the chosen contact instead of reaching across the body. Switch sides after each successful round.
Solves: reaching across the body and avoiding the weaker side instead of learning its spacing.
Goal: 15 forehands, then 15 backhands, while finishing balanced.
4. Move-Around-the-Bounce Drill
Your partner alternates balls slightly left and right. Use small adjustment steps and one controlled lateral move when necessary. Freeze briefly after contact to check balance.
Solves: clean stationary dinks that disappear as soon as the ball moves half a step.
Goal: remain stable after 10 consecutive moving contacts.
5. Height-Window Drill
Place a visual marker several feet beyond the net or imagine a safe window above it. Your goal is not to scrape the tape. Send the ball through a repeatable window and make it descend into the kitchen.
Solves: tape hunting, shoulder-high floaters, and players who change the whole swing to control height.
Goal: 15 balls with safe clearance and no shoulder-high floaters.
6. Cross-Court Control Drill
Dink diagonally with a partner and focus on spacing, net margin, and recovery, not sharp angles. The longer diagonal gives you more room, but the wide bounce demands better movement.
Solves: poor recovery and spacing when the longer diagonal pulls the bounce outside your normal lane.
Goal: 20 controlled cross-court dinks before adding target changes.
7. Pressure Five
Play cooperative cross-court dinks. Earn one point for every five-ball sequence completed without a net ball, out ball, or attackable pop-up. If you miss before five, the count returns to zero.
Solves: mechanics that look good cooperatively but tighten as soon as the rally has a consequence.
Goal: complete three five-ball sequences without visible grip tightening, a rushed swing, or an attackable pop-up.
8. Escape Room Drill
One player may move the ball around, while the other must neutralize back toward a generous inside target. The pressured player focuses on balance, spacing, and recovery rather than trying to win the exchange.
The inside target matters because it removes the temptation to win from a defensive position. The pressured player learns to regain neutral contact before trying to create offense.
Goal: neutralize 10 moved balls into the inside target while finishing balanced and recovering before the next feed.
Practice order: contact before placement, placement before pressure, pressure before speed-ups. If the paddle face is still changing its mind at contact, the drill does not need more strategy. It needs fewer moving parts.
When to advance: move to the next drill when the motion survives the count. One clean dink proves you can hit one. Repeating the goal without squeezing, rushing, or changing the swing is evidence that the motion is beginning to hold.
What Dinking Skill Should You Learn Next?
| Your Current Problem | Best Next Guide |
|---|---|
| You still need the definition, purpose, and complete soft-game learning path. | Dinking in Pickleball |
| Your wrist and elbow keep adding unnecessary movement. | Pendulum Dinking |
| Your routine backhand dink keeps floating or missing. | Backhand Dink |
| Wide backhand balls pull you outside your normal contact window. | Backhand Dinks on the Stretch |
| Cross-court exchanges drag you wide or expose your recovery. | Cross-Court Dink Defense |
| You want to add controlled brushing, dip, and forward pressure. | Topspin Dinks |
| You want to carry the same soft-hand and paddle-face control into the transition zone. | Pickleball Drop Shot |
| Your stroke is dependable and you want patterns, targets, rhythm, and attack timing. | Pickleball Dinking Game |
Bottom Line
A repeatable dink comes from a balanced setup, early movement, clean contact, a stable paddle face, and recovery that begins before the next ball arrives. When the shot breaks, find the earliest part of the motion that stopped doing its job. Under pressure, use the D.I.N.K. Check to decide what the ball allows, create contact in front, give it usable net margin, and keep the resulting bounce down. Strategy gets much easier when the paddle stops creating new emergencies.
How to Dink in Pickleball FAQ
Start balanced just behind the kitchen line with light controlled grip pressure and the paddle in front. Move early enough to create space, contact the ball slightly in front, lift through it with a stable face, finish compactly, and recover before the next shot.
Start near 3 out of 10 as a teaching reference, then watch whether your forearm tightens as the ball arrives. The paddle should feel secure without being squeezed, and you should be able to add a little firmness without changing the whole swing.
Keep the wrist stable through the basic dink. Stable does not mean rigid or frozen; it means avoiding a sudden rescue move that changes the paddle face immediately before or during contact. Add advanced spin only after the basic stroke survives movement and repetition.
A pop-up may come from a tight grip, a face that opens late, a scoop, crowded contact, or reaching from poor balance. Use Coach AJ’s Earliest-Breakdown Rule: check movement and spacing before changing the wrist or swing.
Volley a dink when you can contact it comfortably in front while staying balanced behind the kitchen line. Let it bounce when the volley would jam you, force a late paddle-face change, or pull your momentum into the non-volley zone.
Start with a self-feed contact drill when the contact point or paddle face is unstable. Progress to cooperative repetition, side-specific rounds, movement, height control, cross-court control, and pressure only after the motion survives the previous step.
A push dink uses a stable paddle face and controlled forward lift to create dependable depth and arc. A topspin dink adds a faster brushing path that helps the ball dip and apply pressure, but it demands better timing and spacing. Build the push dink first.